Photo Tips – Shooting the Night Sky
- JAN 05, 2018Warning: count(): Parameter must be an array or an object that implements Countable in /home/howlermag/public_html/old/wp-content/themes/new-paper/includes/general.php on line 193

Your Lead Paragrpah goes here
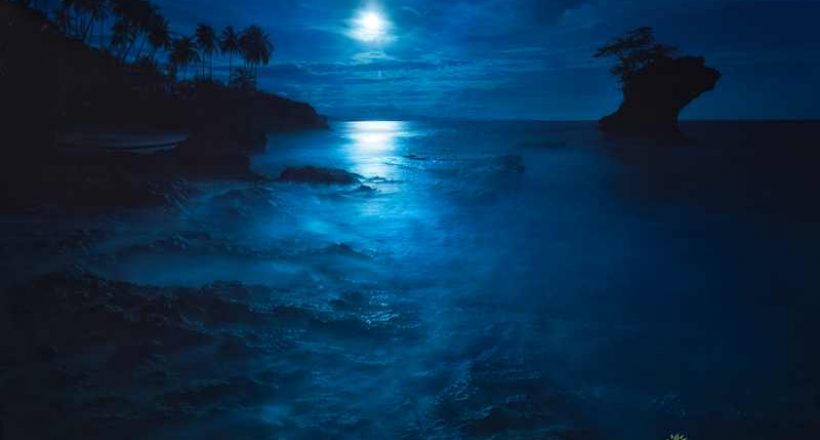
[vc_row full_width=”full_width”][vc_column][vc_column_text]Being out in nature at night is a great experience. The forest comes alive with strange sounds, and many of the most interesting mammals and frogs come out at night. And of course, there is the beautiful night sky.[/vc_column_text][/vc_column][/vc_row][vc_row full_width=”full_width”][vc_column width=”2/3″][vc_column_text]Costa Rica would not be the destination of choice for night sky photography. High humidity levels can compromise the clarity of the night sky, and it’s often cloudy in any case. For night sky photography, people generally head to the deserts of the American southwest, the arid lands of Namibia, or one of the beautiful regions of Chile. Nonetheless, if you happen to be lucky and catch a clear sky in Costa Rica, you can make some cool photos. Indeed, the dry season from December through April offers us the best possibilities for clear skies. Here a few tips to help you out.
First, you’ll really want a DSLR style camera body or at least one of the newer mirrorless cameras. These types of camera will handle noise well and lead to better night sky photos with great detail.
Second, you’ll need a tripod. For photos of the stars as points, you’ll be using shutter speeds of 15 to 30 seconds. For star trails, you’ll want to expose for at least 20 minutes and often longer. During these longer exposures, the stars become trails as the earth rotates.
Third, a lens with a wide aperture such as f/2.8 is a great help. Wide angle lenses from 15 to 35 mm are perfect. In general, you’ll want to use your lens at its widest aperture (the smallest f/number) as this will let in more light, allowing you to keep your ISO values reasonably low so your images don’t become too noisy. ISO values of 1600 to 6400 are common for Costa Rica.
Fourth, practice focusing on distant objects during the day. At night, autofocus won’t work, so you’ll need to learn where to manually focus your lens for the stars. Practicing on clouds during the day and noting where the manual focus point is will be a huge boon once you go out in the dark to photograph stars.
Fifth, learn how to use the histogram on your camera. Our eyes are easily fooled at night by the image on the back of your camera, which will appear exceptionally bright. Using the histogram to evaluate your photo will help you to capture a proper exposure.
Sixth, all night sky images will require a bit of processing in the computer to look their best. Many, if not most, of the stunning night shots we see online are composite images with one photo taken around sunset for the foreground and another taken at night for the stars. (Many others combine shots taken at different times and different places!) I prefer to do “real” nature photography and capture everything in a single image. Reducing the noise in the sky and modifying the contrast and color slightly can really make our images pop while reflecting what we saw when we were taking our photo. Specialized processing software such as Adobe Lightroom or Photoshop are a requirement for great-looking night sky shots.
Though it seems like a lot to take in, night sky photography, though challenging, is fun. Get out there and experiment to begin photographing those great night skies we enjoy on occasion in Costa Rica!
[/vc_column_text][/vc_column][vc_column width=”1/3″][vc_single_image image=”4307″ img_size=”full” add_caption=”yes” alignment=”center” onclick=”link_image”][vc_single_image image=”4308″ img_size=”full” add_caption=”yes” alignment=”center” onclick=”link_image”][vc_single_image image=”4306″ img_size=”full” add_caption=”yes” alignment=”center” onclick=”link_image”][/vc_column][/vc_row]


