
Understanding Shutter Speed
Three main camera controls influence the look of any photo. The aperture, which I’ve discussed in a previous Howler article, affects depth of field. That is, whether everything front to back appears sharp or whether your subject is isolated against a smooth background. The second camera control, ISO, determines the degree of noise (the digital analogue to film grain) apparent in a digital image.
The third camera control is the shutter speed, which refers to the exposure time. Imagine shutters on a house. Open the shutters, and the window is exposed to the daylight. Close the shutters, and light no longer hits the window. Taking this analogy over to the camera, the shutters are the curtains that cover the digital sensor (i.e., the window). When you press the button to take a picture, the camera’s shutter curtains open to expose the digital sensor to the light. The shutter curtains close again to end the exposure. (Today’s smartphones and compact cameras function differently, but the analogy still works.)
You can manipulate the shutter speed to influence the look of your picture. Let’s say you’re photographing a flying scarlet macaw. It moves pretty quickly. If you want to freeze that motion and take a sharp, detailed picture of the macaw, you need a fast shutter speed, say 1/1,000th of a second or shorter. What if you use a slower shutter speed, say 1/10th of a second? Your macaw will now be blurry because it is moving for a longer time as your photo is being exposed. As the photographer, you can choose the shutter speed for the effect you want.
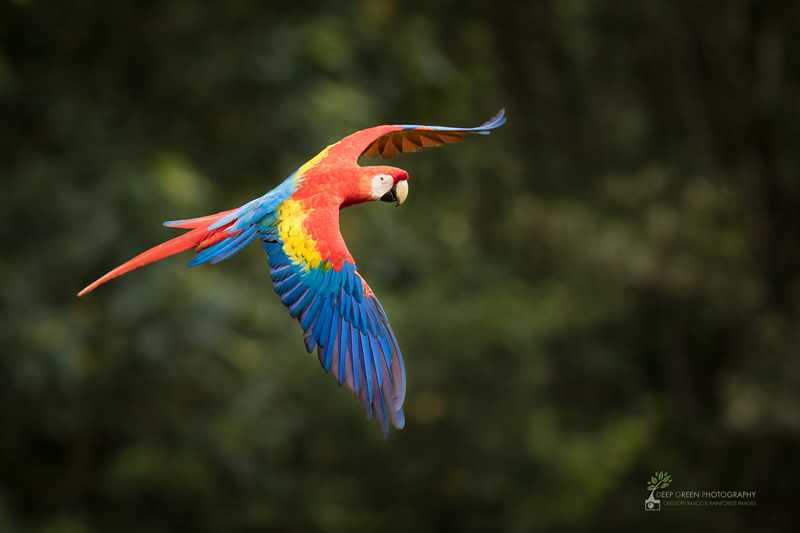
To photograph this flying wild scarlet macaw, I chose a fast shutter speed – 1/1000th of a second. This shutter speed froze the wings and gave me great detail.
In my nature photography, I shoot with my DSLR camera in manual mode. That means that I set all three of my camera variables myself (aperture, ISO, and shutter speed). Even though, as I pointed out above, each control has a different effect on the look of the picture, the three work in concert to determine the exposure – the amount of light recorded by our camera’s digital sensor. As a pro, I like to be in control of everything.
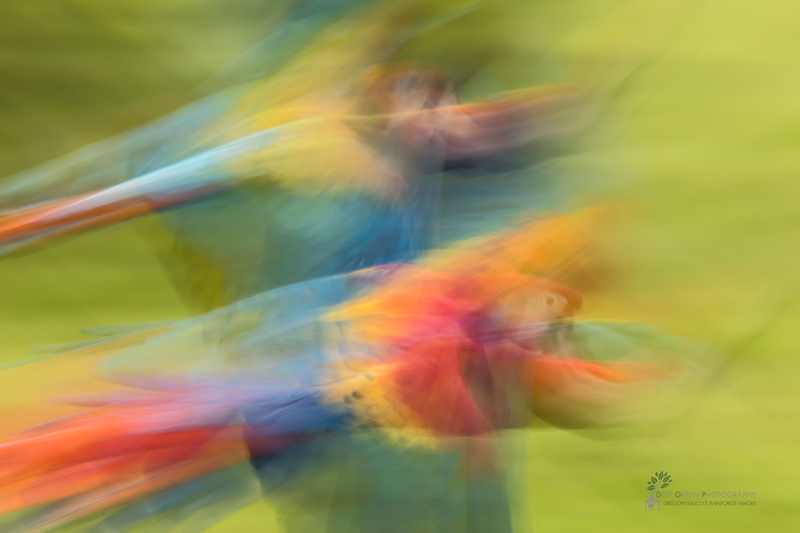
Just a few minutes later, I changed to a slow shutter speed (1/6th of a second) for a more abstract rendering as a scarlet macaw flew by with a great green macaw.
But what if your camera doesn’t offer you manual shooting or if you prefer to use one of your camera’s automatic modes? There’s nothing wrong with that, and you can still think about shutter speed, even if you’re shooting with your smartphone. Just remember that wide apertures (e.g., f/1.8) and high ISO values (e.g., 800) let in more light and will yield faster shutter speeds.
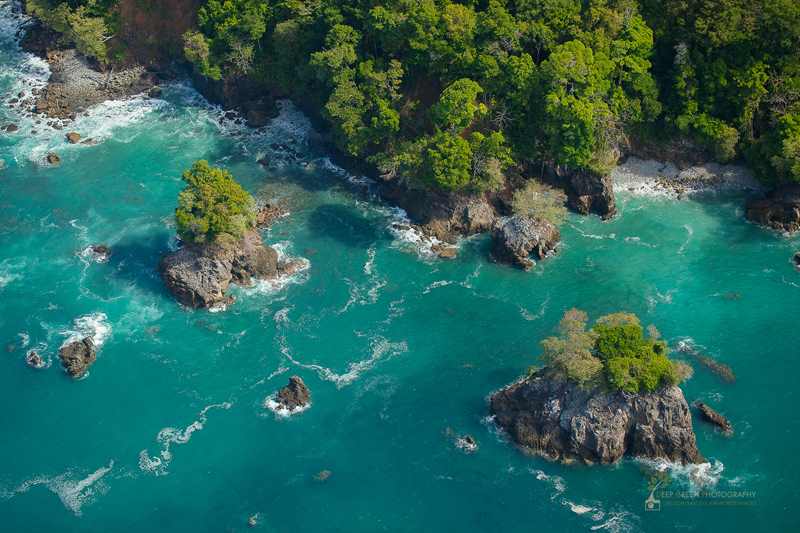
While shooting from an ultralight plane over Manuel Antonio National Park, I needed to keep a fast shutter speed to avoid shake. I chose 1/800th of a second for this shot of an isolated rocky cove.
Conversely, narrow apertures (e.g., f/16) and low ISO values (e.g., 100) let in less light and will result in slower shutter speeds. Experiment with different settings next time you’re out shooting to see how shutter speed affects motion in your pictures.
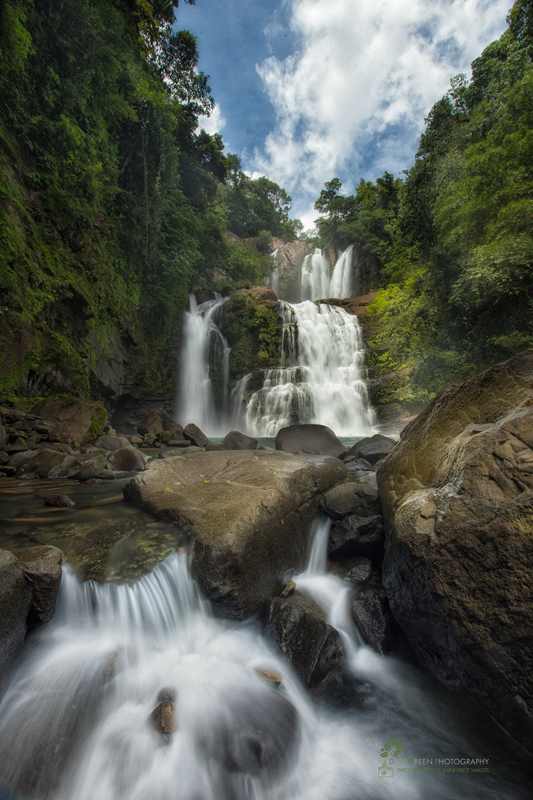
While shooting the nearby Nauyaca waterfalls a couple of months later, I chose a slow shutter speed of 2 seconds to give the water a silky feel.